BEER CAN Crochet Cowboy Hat - Full Tutorial w/ Video
BEER CAN Crochet Cowboy Hat
Full Tutorial w/ Video
 |
| Beer Can Crochet Cowboy Hat - Tutorial & Video |
Ok! Finally moving on to some funner shapes and designs. I love this!!
I wanted for sure to make a Cowboy beer can hat, and I gotta say I like it. I figured out how to make a dip in the top which I think looks pretty cool. And pinned the brim on the sides all country like.
It really is a good size sun visor! Which you will need when you are sporting this around town all summer.
Video: BEER CAN Crochet Cowboy Hat - Full Tutorial
Full Crochet Pattern for Instant Download HERE.
Beer Can Cowboy Hat
Materials & Tools

Now I know I have requested that you use anything but the plain old standard beer cans, since there are so many colorful (tastier) options these days. However! I do believe there is a place for a true classic. Come on! By all means, if you have fond memories, or it's your uncle's favorite, or whatever, a basic cheap beer can be just what you need.
Personally, PBR has a special place in my heart, just for college memories. More than one friend still has a PBR hat made by college me. So I saved these cans just for the Beer Can Cowboy Hat because it just seemed appropriate. Along with this RH heathered blue yarn called Denim. I have to admit I am diggin it!
Cut the Cans
 |
| Cut 4 tall labels. |
 |
| Cut 2 short labels. |
Punch the Holes
Use the hole punch to make 4 holes along the top & bottom of the taller labels, 5 up the sides. For the square labels, punch 4 on each side.
 |
| Holes punched and ready to go. |
Edge the Labels
Single crochet around, working 3 stitches into each hole, 5 in the corners. We will not add a second round this time.
 |
| Work 3 singles per hole, 5 in the corners. |
 |
| 6 labels with crochet edges. |
Note: All of the above info is covered in more detail in Part 1 of the 3-in-1 Tutorial.
Join the Labels
Here we will use the faster joining method I showed you in Part 3 of my 3-in-1 Tutorial.
Lay out the labels in this order: tall, tall, short, tall, tall, short.

Take two adjacent labels and hold back to back, lining up the bottom edges. Matching up the stitches, join using Sc2tog. Pulling the first loop through the Front label, and the second loop through the Back label, then finish the stitch. Try to keep the stitches on the looser side for this part.
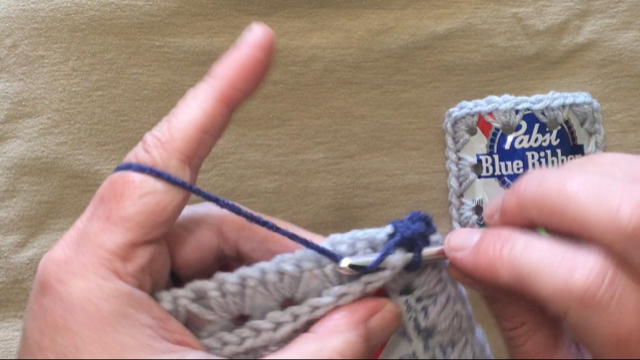 |
| Draw 1st loop through Front label. |
 |
| Draw 2nd loop through Back label. |
 |
| Finish the stitch. |
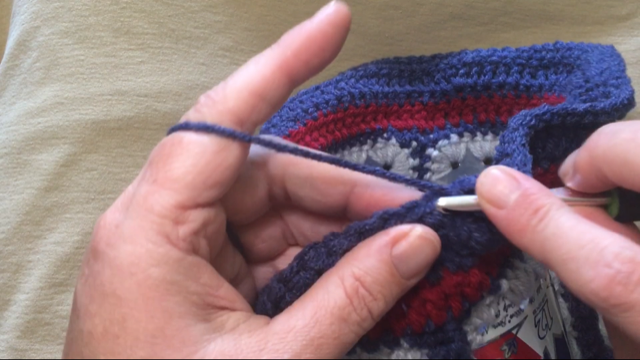
Short labels should be 3 stitches shorter than tall labels. Work each seam in the same direction. Continue until you have a crown with an irregular top edge.
 |
| Repeat join for each label. |
 |
| The cowboy hat Crown. |
Finish the Edges
For the curvy top edge, start at the seam between 2 tall labels. Work 2 doubles together into one corner stitch and the seam stitch.
 |
| Dc2tog into one corner and seam. |
Double crochet across, until you have 3 stitches left. Work 2 half doubles, then a single into the corner.
 |
| Work to the last 3 stitches on that label. |
 |
| End with single in the outer corner. |
Turning into the inner corner (where short & tall meet), work single/half double together, 2 doubles together into the inner corner seam, then half double/single together.
 |
| Work single/half double together. |
 |
| Double 2tog into the seam. |
 |
| Work half double/single crochet together. |
Continue with singles across until you have 3 stitches left, then mirror what we just did in the other corner. Ending with a single into the outer corner stitch.
 |
| Work the mirror of what we just did above. |
 |
| End with single in the outer corner. |
Again, work 2 half doubles, then back to doubles across. Until you get to the seam, then repeat everything above. See the video for a better view of how this works.
 |
| Work doubles again to the side seam. |
 |
| Dc2tog into corner and seam. |
In the end you should have some nice curves around the short and tall label edges.
 |
| Curvy top edge complete. |
 |
| Work singles along bottom edge. |
Crochet the Top
 |
| Round 2 |
 |
| Finishing round 4. |
 |
| 6 rounds total. |
Join the Top to the Curvy Crown
 |
| Stitch through both layers. |
 |
| Top attached. |
Add a Flat Brim
For this style I like to add a hat band because I think it looks and fits better. Do this by working straight doubles around, then a round of singles. Note: these 2 rounds do not count as Brim rounds.
 |
| Band complete. |
The Brim I used here is a flat brim folded up and attached to the sides. This is basically the same brim from the Giant Multi-Level tutorial.
We will alternate doubles and singles each round, and add 1 stitch between increases only on the double crochet rounds (until the last rnd). So round 1 is 6 doubles between increases, and round 2 is straight singles. And so on until you get to round 6.
 |
| Increase on double rounds only, until the last round. |
 |
| Starting round 5. |
 |
| Increase in round 6, find the side seam. |
For round 6, work 9 single crochet between increases. When you get to a point that is lined up with the side seam between the 2 tall labels, slip stitch into that seam at half way up the label, then return to working singles as you were. Repeat for the other seam as well.
 |
| Go half way up the label. |
 |
| Slip stitch into seam. |
 |
| Dang right!! |


THIS WAS AMAZING THANK YOU!!! I AM ROCKING A RED COCO COLA HAT!!!!
ReplyDelete