Crochet BEER CAN Rock Star Party Fez!! 3-in-1 Hat Tutorial - Part 2
Crochet BEER CAN Rock Star Party Fez!
Easy 3-in-1 Hat Tutorial - Part 2
 |
| Ultimate Beer Can Party Hat Tutorial |
Yay!! I am rolling along with these new tutorials and having a blast. As I was finishing up the last one, it occurred to me that I was not very clear about something. That is, how do I put this?
The deeper purpose of crocheting beer can hats.
See, I have a vision.
When I started making beer can hats, it was as kind of an art nerd party trick. I was an art student who was really into crochet, like I incorporated it into as many of my art classes as I could.
I was also writing my own hat patterns, and I loved the 70s crafts overall. So when I saw a pic somewhere of the 70s beer can hats, it was a no brainer.
I started taking beers to parties, and when the
cans were empty, I'd spend the rest of the party crocheting a fabulous
host gift.
The
reactions I would get were always of wonder and amazement. From art
students and old grandmas alike! Non crocheters are fascinated by the
process, and probably further by the setting. Like who crochets at a
party? With beer? Ha.
Now my dream is...
To see a whole new wave of crocheters make this a thing. Your higher purpose here is to show everyone else how fucking cool crochet can be.
You and I both know textiles in general get demoted in the big picture of art and life. Granny stuff. Not artsy fartsy. Whatever.
Now I challenge you to spread the fun and funk of live party crocheting with beer cans. Show the mundanes what cool crochet is all about. While also leaving as the Winner of the Party. Hero status for sure. Amen.
If you're curious about how I became a world famous and published beer can hat designer, see my promo video here: NEW *Creative* Beer Can Hat Tutorials 2022
- A link to a video tutorial on my youtube channel.
- A link to a complete pattern in my little store.
And now, on to Part 2 of my...
*Deluxe* 3-in-1 Beer Can Party Hat
Crochet Tutorial
Video: Crochet BEER CAN Rock Star Party Fez!! 3-in-1 Hat Tutorial - Part 2
Full Crochet Pattern for Instant Download HERE
3 Part Series = 3 Hat Possibilities!
This is a very comprehensive tutorial that will teach you to crochet a complete Beer Can Hat in 3 Parts. Each Part is a step in the process, but each Part can also be a hat on its own! What?? Genius!
Easily Adapted to Real Live Party Crochet Situations
So
when you are crocheting a Beer Can Hat at the party (dazzling and
confounding everyone around you), and feel the *need* to dance or do too
many shots or whatever... you can finish up quickly and still be the Craft Nerd Party Hero of the night. I am here for you.
See Part 1: The Crown for starting instructions and more info about all 3 Parts.
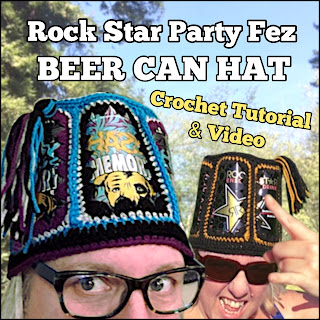
Crochet Beer Can Rock Star Party Fez
3-in-1 Hat Tutorial - Part 2
Here I will continue from where we left off in Part 1. You should have the can labels all crocheted together and the edges finished.
Now I'll show you how to add the top of the hat, how to make a slightly angled Fezzy shape if desired, and an optional tassel.
Just for fun I am using tall cans this time, and playing around with colors more. Of course, use whatever size cans and yarn colors you have available. I just want to show you lots of possibilities!
Featuring Lagunitas Hazy Memory IPA, and Rock Star energy.
.png) |
| The Crown is already constructed, from Part 1. |
Crochet the Top
Start with a chain 4 ring and work 12 double crochet into the ring.
 |
| Round 1 |
We are going to alternate each round with single crochet and double crochet. So for round 2, work 2 singles into each stitch.
 |
| Round 2 |
 |
| Black yarn not the best for seeing details. Oops |
For the next 3 rounds, add 1 stitch between increases (2 stitches in the same spot) for each round. So round 3 is doubles, with 1 stitch between increases.

 |
| Round 3 |
Round 4 is single crochet with 2 stitches between increases.

 |
| Round 4 |
Round 5 is double crochet with 3 stitches between.

 |
| Round 5 complete. |
Choose Your Own Beer Can Adventure!
If you want the regular straight hat shape (Will fit perfectly onto the Crown from Part 1): Continue as above for 2 more rounds.
Round 6 is singles with 4 stitches between increases.
 |
| Round 6 |
Round 7 is doubles with 5 stitches between increases. Tie off. Skip to Join the Top below.
 |
| Round 7 |
If you want a slightly angled Fezzy shape: Work round 6 in double crochet with 4 stitches between increases. Tie off.
 |
| Fezzy Round 6 |
For this shape, you also need to take in the crown a little bit on the top edge. You can rework the singles we did in Part 1, decreasing (sc2tog) twice at the seam corners (work into 2 stitches before, and 2 stitches after seam).
Or,
if you don't want to tear out the edge stitches, you can work a second
round of singles, decreasing as described at each seam spot.

 |
| Sc2Tog into 2 stitches before seam, and again into the 2 after. |
 |
| Finishing the Sc2Tog. |

Join the Top to the Crown
Starting anywhere on the top edge of the Crown (labels facing you), match up the stitches with the Top, and work single crochet through both layers all the way around. Tie off.

 |
| Stitch through both layers. |

Choose Again:
If you are ready to add a brim (cap or fisherman) and learn a faster construction method for real life party crochet situations... move on to Part 3: The Cap.
If you want to finish up your Fez with a bottom band and snazzy Grand Poobah tassel, read on.
Finish the Fez
This part is kind of optional, but I think it looks and fits better with a small band on the bottom edge. Do this by working a round of double crochet, then a round of singles, and tie off.

 | |
| See? Much better. |
Add a Tassel
Use a small hard cover book (or folded cardboard) with a width that equals the length of your finished tassel. Wrap the yarn around the book 20-25 times. Here I did 5 wraps for each of my 4 colors.
 |
| Wind the yarn 20 times. |
Carefully cut the yarns in the gap of the book cover.
 |
| Cut the yarns. |
With a separate length of yarn, tie the folded yarns tightly in the center.

 |
| Tie in the center with square knot. |
With another length of yarn, tie one end about an inch below the first tie. Tuck end into yarns.

Wrap tightly around tassel for about 1/2 inch, then tie to itself tightly.
 |
| Wrap for 1/2 inch. |
 |
| Tie end to itself. |
Use a yarn needle or crochet hook to pull the yarn end under wrapping. Trim the tassel ends if needed.
 |
| Pull through wrapping. |


Tie the end yarn piece to the center of the Top, leaving some length to dangle properly.
 |
| Tie to center Top of hat. |
Now you are totally ready for your Beer Lodge meeting!

Next up, Part 3: The Cap!! I'll show you how to add a brim (cap or bucket), use a shorter crown shape, and a faster construction method. Yes, for real life party crochet situations! See you there.


Comments
Post a Comment